Installation
Welcome to Docker! This guide will take you through the various mini-tutorials to help you understand Docker.
Setup
The first step is to ensure that you are on a Windows laptop. Docker does not run natively on Windows or Mac OS X. But help is at hand. All you need to do is use a tiny Linux VM that you can use to run Docker images and container. This tiny VM is packaged in a nice utility called boot2docker and that is what we will install next.
From the official Github page, “Boot2Docker is a lightweight Linux distribution made specifically to run Docker containers. It runs completely from RAM, is a small ~24MB download and boots in ~5s”.
Update : 15-Aug 2015 : Boot2Docker has now been deprecated in favor of Docker Machine. But you can still go ahead and install Boot2Docker since behind the scenes on Windows / Mac OS, it still runs the Boot2Docker image. So conceptually, everything will remain the same.
Check out the boot2docker.io home page for more details on this utility.
If you want to use the latest Docker Toolbox, then I suggest you follow the instructions here or you can go directly to the Installing boot2docker section (next one).
Installing boot2docker
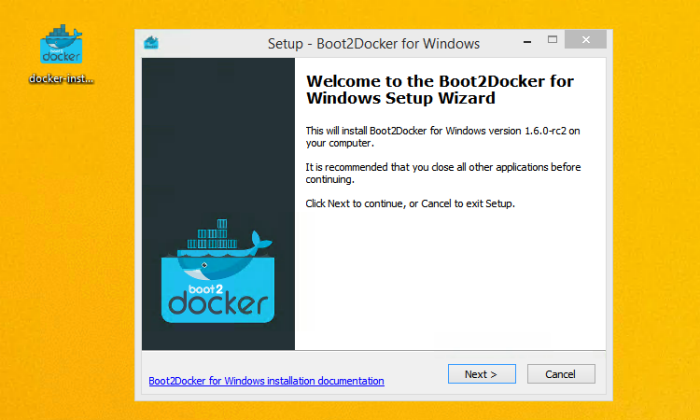
Download the latest version of boot2docker from here. Click on the link to download docker-install.exe and you are all set.
Installation instructions are straightforward and we advise you to follow them slowly and install the software on your laptop. They are reproduced below (from the official site):
Download the latest release of the Docker for Windows Installer.
Run the installer, which will install Docker Client for Windows, VirtualBox, Git for Windows (MSYS-git), the boot2docker Linux ISO, and the Boot2Docker management tool.
3. Run the Boot2Docker Start shortcut from your Desktop or “Program Files → Boot2Docker for Windows”.
4. The Start script will ask you to enter an ssh key passphrase — the simplest (but least secure) is to just hit [Enter].
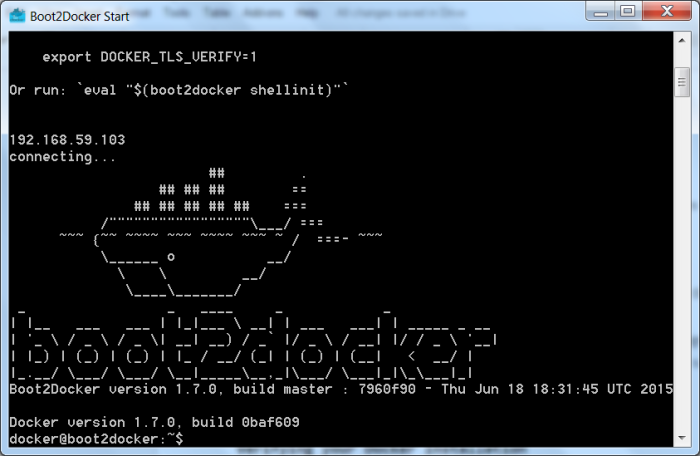
5. The Boot2Docker Start will start a unix shell already configured to manage Docker running inside the virtual machine. An example is shown below:
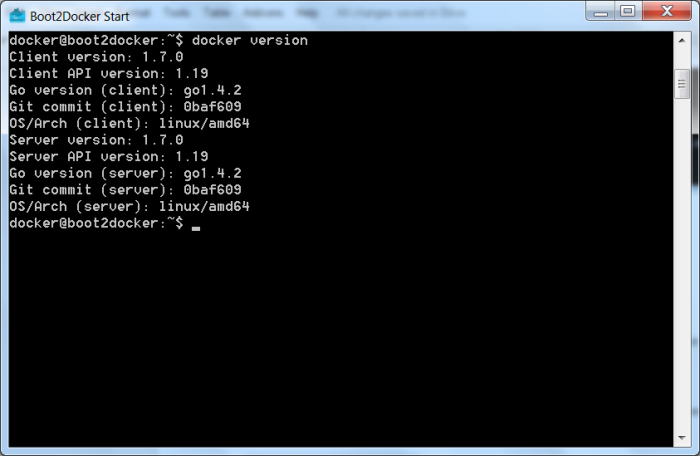
6. Run docker version to see if it is working correctly:
Verifying your Docker Installation
No matter what you want to do with Docker, the first thing is to start boot2Docker and let the VM start itself up and transport you to the Unix Prompt.
So all the steps assume that you have followed the instructions in the previous section and started boot2Docker. If not do start boot2Docker via the Shortcut :
Boot2Docker Start will automatically start a shell with environment variables correctly set so you can start using Docker right away:
Let’s try the hello-world example image. Give the following command at the prompt:
docker@boot2docker:~$ docker run hello-world
This should download the very small hello-world image and print a Hello from Docker. message.
Understand what we are running!
A lot of stuff happened behind the scenes to get the Hello World running. While we may not go into the specifics of all that for now, these are roughly the steps:
You used the docker client application via the docker command.
You gave the command run hello-world to the docker client application.
In other words, you told the docker client to create an instance of a Docker Image titled hello-world.
Where is this Docker Image? On your local system ? Somewhere on the Internet ? What is going on ?
Well, the default behaviour is a sensible one i.e. the docker client looked for an Image titled hello-world in your local repository i.e. on your local machine. It did not find it (obviously) — so it went to the Internet and hit a URL at Docker Registry ( a public repository of Docker Images hosted by the company behind Docker). It found it there (I cheated … since I knew the name “hello-world” is one of the existing images out there. But you get the point). Once found, it started to download the Image (all its layers) and once it was present locally, it launched an instance (Container) based on that image.
The default command was then executed to print out some message on the console, which is what you saw.
Try out the following Docker commands
Since the image “hello-world” is now present locally, it should be available in our local repository.
Try out :
docker@boot2docker:~$ docker images
and verify that you see the image listed there.
Try launching another container based on the same image. Give the following command:
docker@boot2docker:~$ docker run hello-world
It should print out the same message that you saw earlier.
The command $ docker ps gives you a list of running containers. Try it out and see if you can find any running.
Try out:
docker@boot2docker:~$ docker ps -all and see if they are visible now.
Use ‘ — help’ option. For e.g. docker ps — help
Even if you do not understand everything at this point in time, that is fine. These commands were meant to get you to start thinking of the typical operations you will need to understand/execute while dealing with Images / Containers.


Comments
Post a Comment